So you’re thinking of trying Kiss Gel Fantasy Nails? Hold off tapping that card until you’ve read this review in full. This is your no-nonsense guide to whether they’re worth your money, and how they actually hold up in the real world.
*This site contains product affiliate links. We may receive a commission if you make a purchase after clicking on one of these links.*
About Kiss Gel Fantasy Nails
Kiss is already a well-known brand for stick-on nails, lashes, and all things beauty-on-a-budget — but their Gel Fantasy range has become especially popular for anyone after a gel-like finish with zero UV lamps or drying time involved. Think shiny, sculpted tips without the nail tech price tag.
You can get them in two application styles: adhesive tabs or glue. Both have their pros and cons, and I’ll cover that below. But the general idea? Salon-looking nails in under 10 minutes.
Let’s break it all down.
Ease of Application – 9/10
If you’ve never used press-ons before, these are beginner-friendly. Everything comes pre-shaped, pre-polished and prepped. The box includes 24 nails in different sizes, a mini nail file, a wooden cuticle stick, and your chosen adhesive method (the set comes with Kiss nail glue but you can use sticky tabs for ease).
I found the glue-on method gave a more secure fit and longer wear, but it’s less forgiving if you mess up the placement. The sticky tabs are great for short-term wear (think one night out), and easier to remove.
How to Apply Kiss Gel Fantasy Nails
1. Start with clean hands
Wash your hands thoroughly with soap and water. Make sure your natural nails are completely clean and dry before starting — this helps the glue stick better and prevents lifting.
2. Choose your sizes
Each Kiss Gel Fantasy nail has a small number printed underneath it — this indicates the size. Match the right size to each of your fingers and lay them out in order before you begin. If a nail doesn’t fit perfectly, you can file the sides slightly for a better match.
3. Apply the glue (double-sided method)
Kiss recommends applying glue to both the artificial nail and your natural nail:
- Add a drop of glue to the back of the press-on nail
- Add another drop to your natural nail
4. Press and hold
Align the nail with your cuticle (the curved end should sit just above it), press down gently but firmly, and hold for at least 5 seconds. This helps the glue bond properly.
💡 Expert Tip: Apply enough glue to avoid air pockets — this helps secure the nail and can extend how long they last.

Application time was around 10 minutes once I figured out my sizes. Tip: lay all ten nails out in order before starting to make the process smoother.
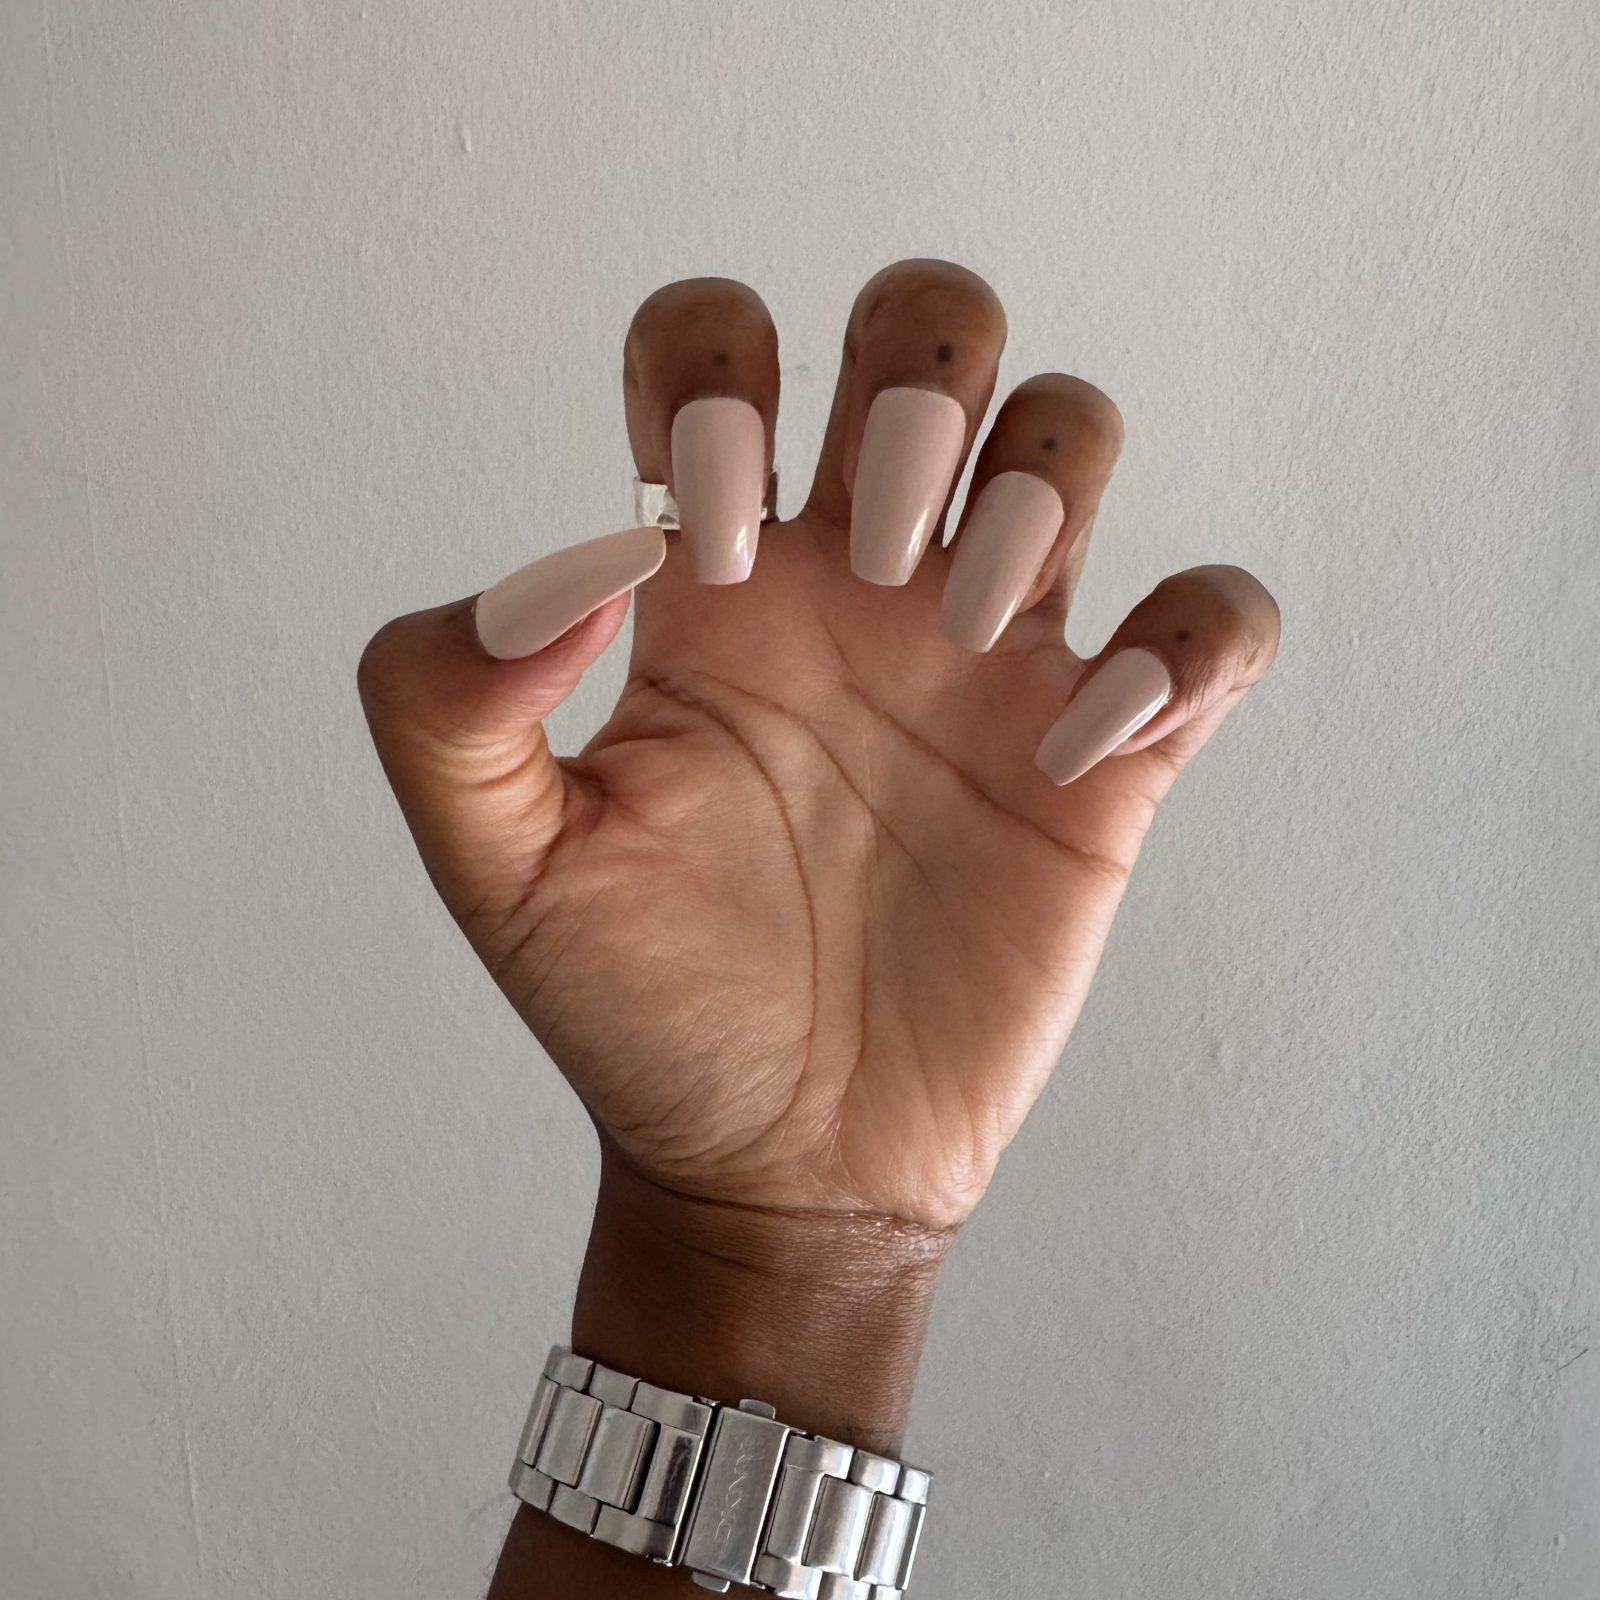
Look & Finish – 6/10

This is where Kiss press-on nails really shine — literally. The finish is ultra-glossy and mimics a salon gel mani surprisingly well. In the image above you’ll see the nails are slightly thicker at the like real-life acrylics! I got the Long (L) variety, but they also have shorter gel nails if that’s what you like.
The designs range from classic French tips to glitter fades and modern nudes, so there’s usually something for everyone.
Another slight criticism is their fit around the cuticle. I have large nail beds than most and this style is quite narrow, so maybe that’s why. But, you can see my natural nail bed peeking out from the side and from the top, they definitely don’t look like a real set of acrylic nails.
They’re also a bit longer and curvier than your average press-ons, so they really give that sculpted gel look. If you prefer a more natural length, you might need to trim or file them down — which they handle pretty well without cracking.
Wear Time – 7/10
This will depend on how you apply them and what you put your hands through. With glue, I got around 5–7 days of decent wear before any started to lift. With the adhesive tabs, it was more like 1–2 days max.
They are definitely thinner than other press-on nails that I’ve tried, hence the slighlty lower score. This is great for comfortability but they’re a little flimsy in my opinion.
As such, they’re not indestructible — if you’re typing all day or opening a lot of packaging, you’ll probably lose a couple before the week’s out. But for a weekend event or a few days of looking polished, they do the job. I also like to use stronger nail glue to ensure they don’t ping off.
Check out our blog on how to make press-on nails last to help you get more out of your set.
Affordability – 6.5/10
You can usually grab a box for under £10, depending on the design and where you buy them. Considering the quality of the finish and how many nails you get (with spares), they’re a solid option for budget-conscious beauty lovers. But they’re rather thin and don’t look absolutely perfect, so I’ve knocked a couple of points off for this.
In my opinion they are not reusable. They bend and break when you remove them (if you’re using glue), although you may have more success if you use sticky tabs. So if you’re replacing them every week or so, you may as well have spent £40-£50 on a set of new acrylics. Although, you’ll have quite a bit of regrowth if you do!
Final Thoughts
7.1/10
Good, but not perfect!

Kiss Gel Fantasy Nails are a strong contender if you want the gel look without the commitment. They’re quick, cheap, and glam — ideal for events, holidays, or just when your regular mani is looking tragic.
Just make sure to prep your natural nails properly and choose the right adhesive for your needs. If you’re heavy-handed or want them to last all week, go for the glue. If you’re testing the waters or want easy removal, try the tabs.


